Japanese walnut ink
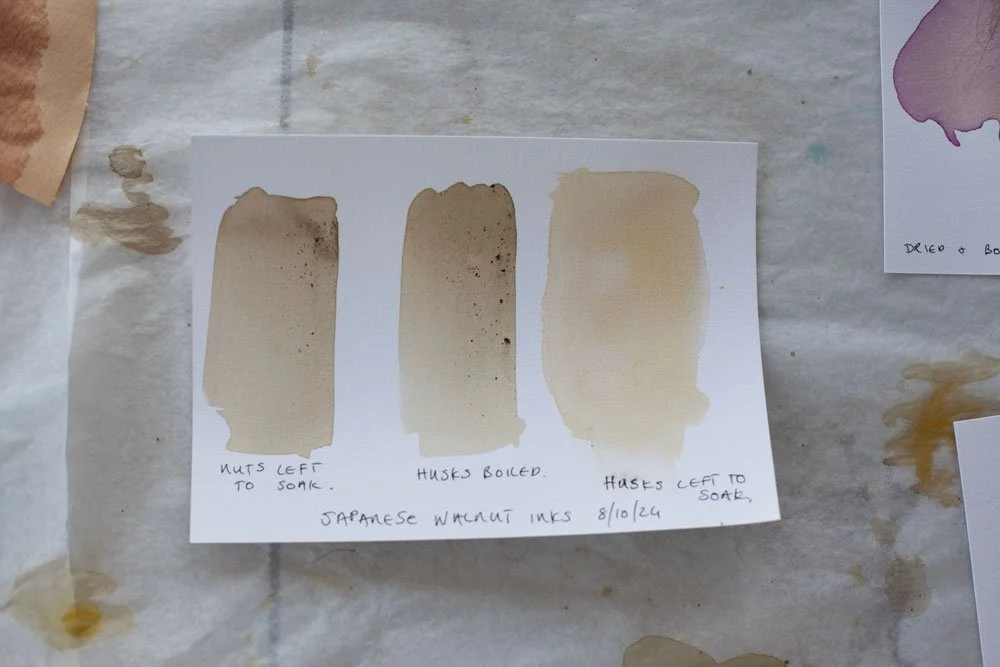
My neighbours have a beautiful Japanese walnut tree so I gathered some walnuts to make an ink with. Here is how I did it along with the results. I had collected a fair amount of walnuts so I decided to try 2 methods to extract colour - boiling and soaking. I ended up with 3 different inks as I used both the husks and the nuts.

Japanese walnuts gathered from a neighbours garden
Japanese walnut INK RECIPE #1
INGREDIENTS
300g of walnut husks
480ml of filtered water (or rain water)
Gum Arabic
Clove
METHOD
Place the walnut husks in a pot with 480ml of water
Bring to the boil and then simmer
Simmer until two thirds of the liquid is gone (it took approximately 1 hour for me)
I forgot to leave the husks to soak and cool in the pot so I’m not sure if this would have made a big difference or not.
Filter the liquid through a funnel & coffee filter
Add 10 drops of gum arabic & a clove
Preparing the walnut husks
The husks and liquid after being simmered for an hour
Test strips - I love these tiny little landscapes that form naturally
Job done!
Japanese walnut INK RECIPE #2
INGREDIENTS
200g of walnut husks or 200g of just the walnuts
Boiling water
Gum Arabic
Clove
METHOD
Place the walnut husks in a clean glass jar
Cover with boiling water
Leave in a sunny (or just a bright) place for several days
Filter the liquid through a funnel & coffee filter
Add 10 drops of gum arabic & a clove

Leave the husks to soak for several days

Decanting and filtering the walnuts through a coffee filter and funnel

Time to test the inks (and make a mess!)